Careers
diy hanging basket for flowers
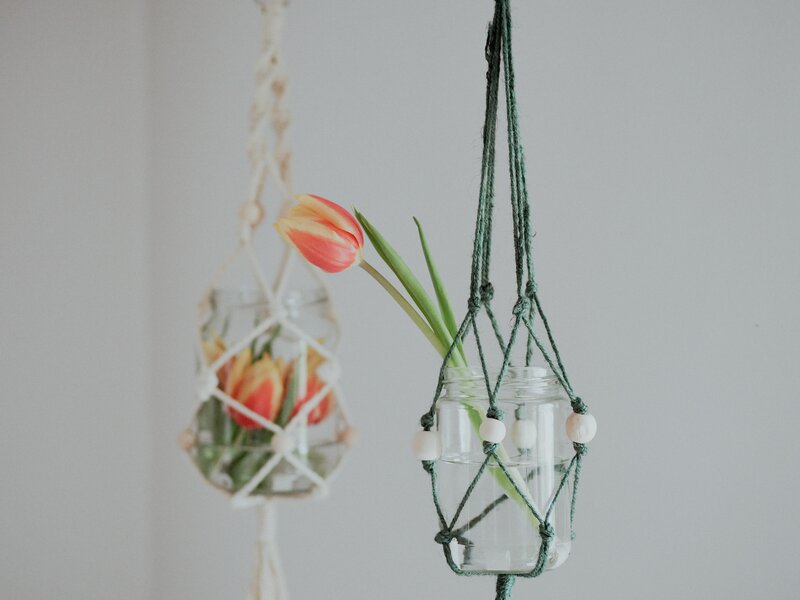
A decorative macramé hanging basket in no time at all – ideal for plant lovers and as a stylish gift. With a few materials and simple instructions, you can create a unique highlight for your home in no time at all!
Beginner
3 minutes reading time
Macramé is a fascinating knotting technique with a long history. It dates back to the 13th century, when Arab weavers developed it, and experienced its heyday with seafarers in the 19th century, who used it to make nets and hammocks. Today, macramé is a creative hobby that is perfect for making beautiful hanging baskets – a highlight for your home or a loving gift.
Macramé is a fascinating knotting technique with a long history. It dates back to the 13th century, when Arab weavers developed it, and experienced its heyday with seafarers in the 19th century, who used it to make nets and hammocks. Today, macramé is a creative hobby that is perfect for making beautiful hanging baskets – a highlight for your home or a loving gift.
With just a little material and no prior knowledge, you can conjure up these charming macramé flower hangers in no time at all. Whether as a pretty decoration with glass vessels and flowers or as an original packaging for herbs and small plants – there are no limits to your creativity!
You will need:
· A metal ring (e.g. a key ring)
· 4 x 130 cm cord (mason's twine, jute twine or cotton yarn)
· 3 x 30 cm cord (mason's twine, jute twine or cotton yarn)
· Optional: wooden beads with large holes or EM ceramic pipes
· A glass vessel or a flower pot (e.g. empty pickle jars)
Instructions: It's as easy as this
1. preparation
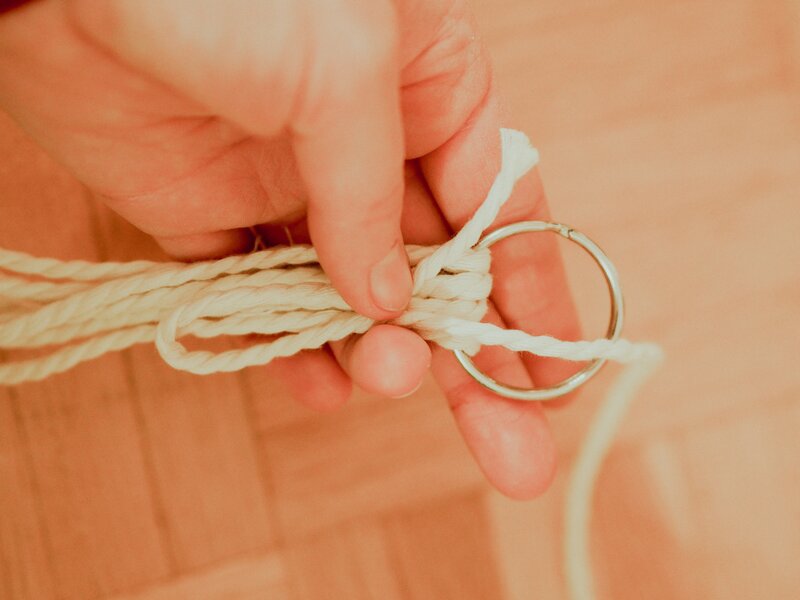
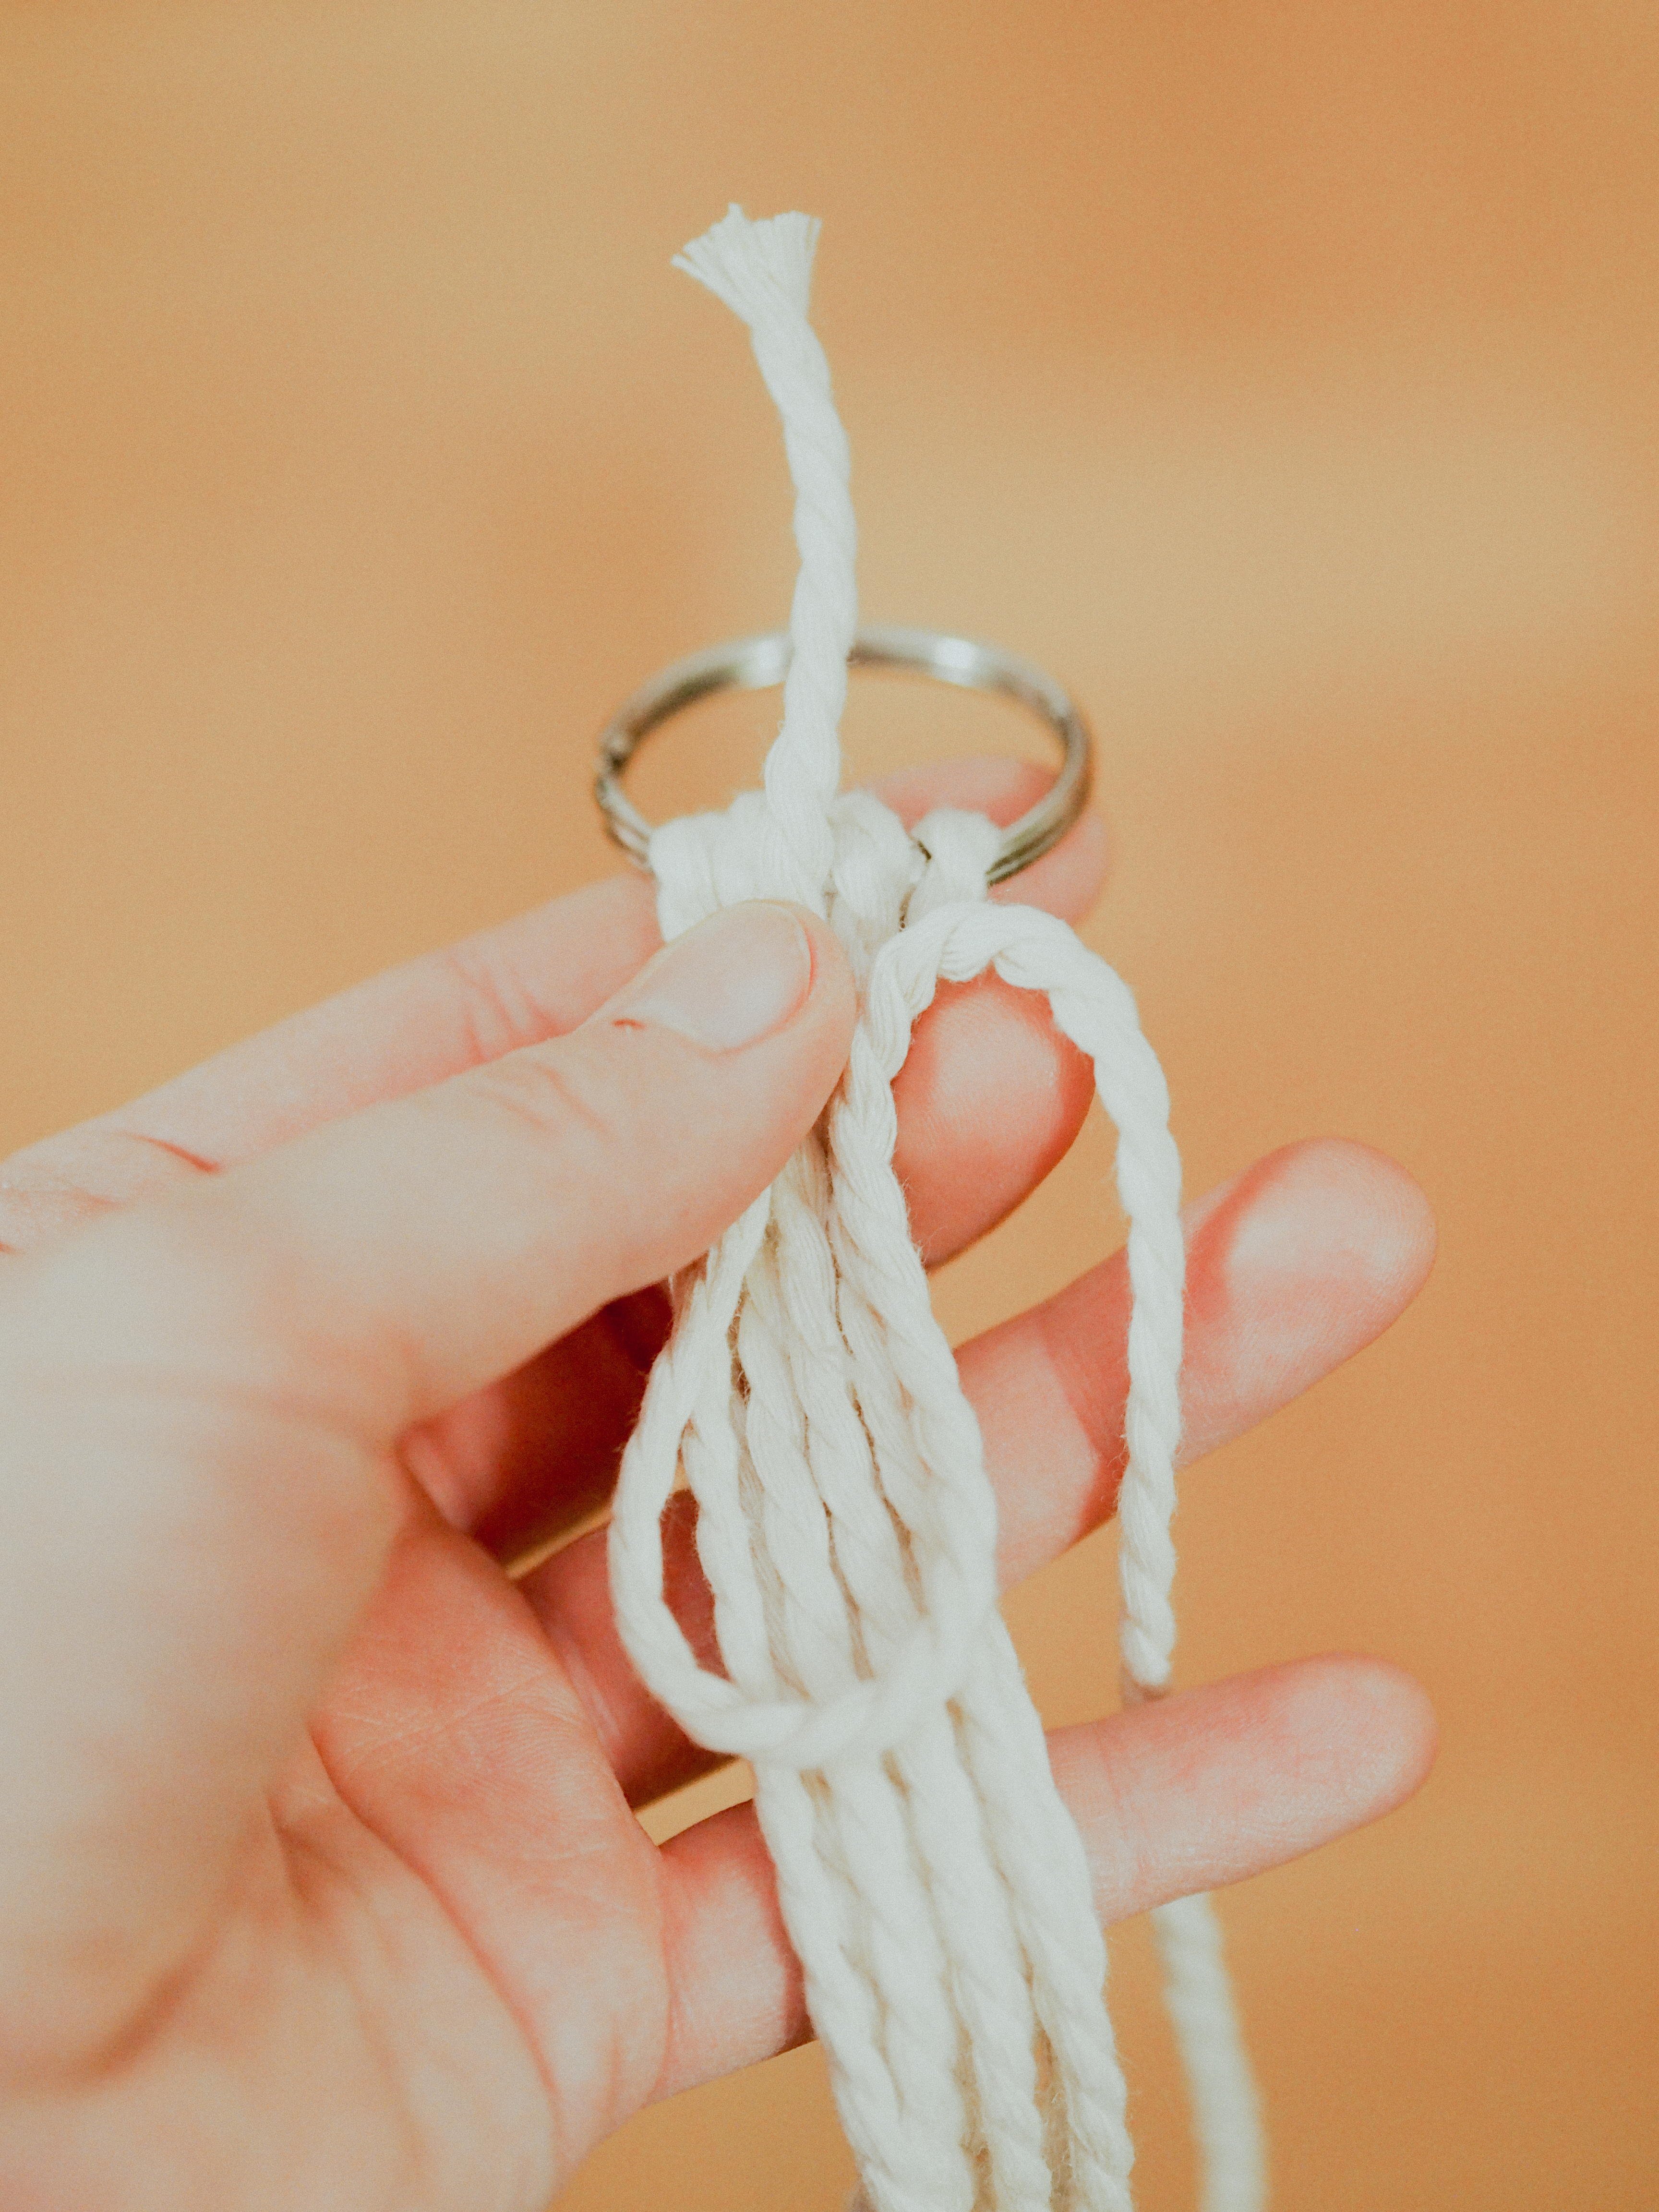
Hang the metal ring on a nail or stick it to your work surface. This will allow you to work most comfortably.
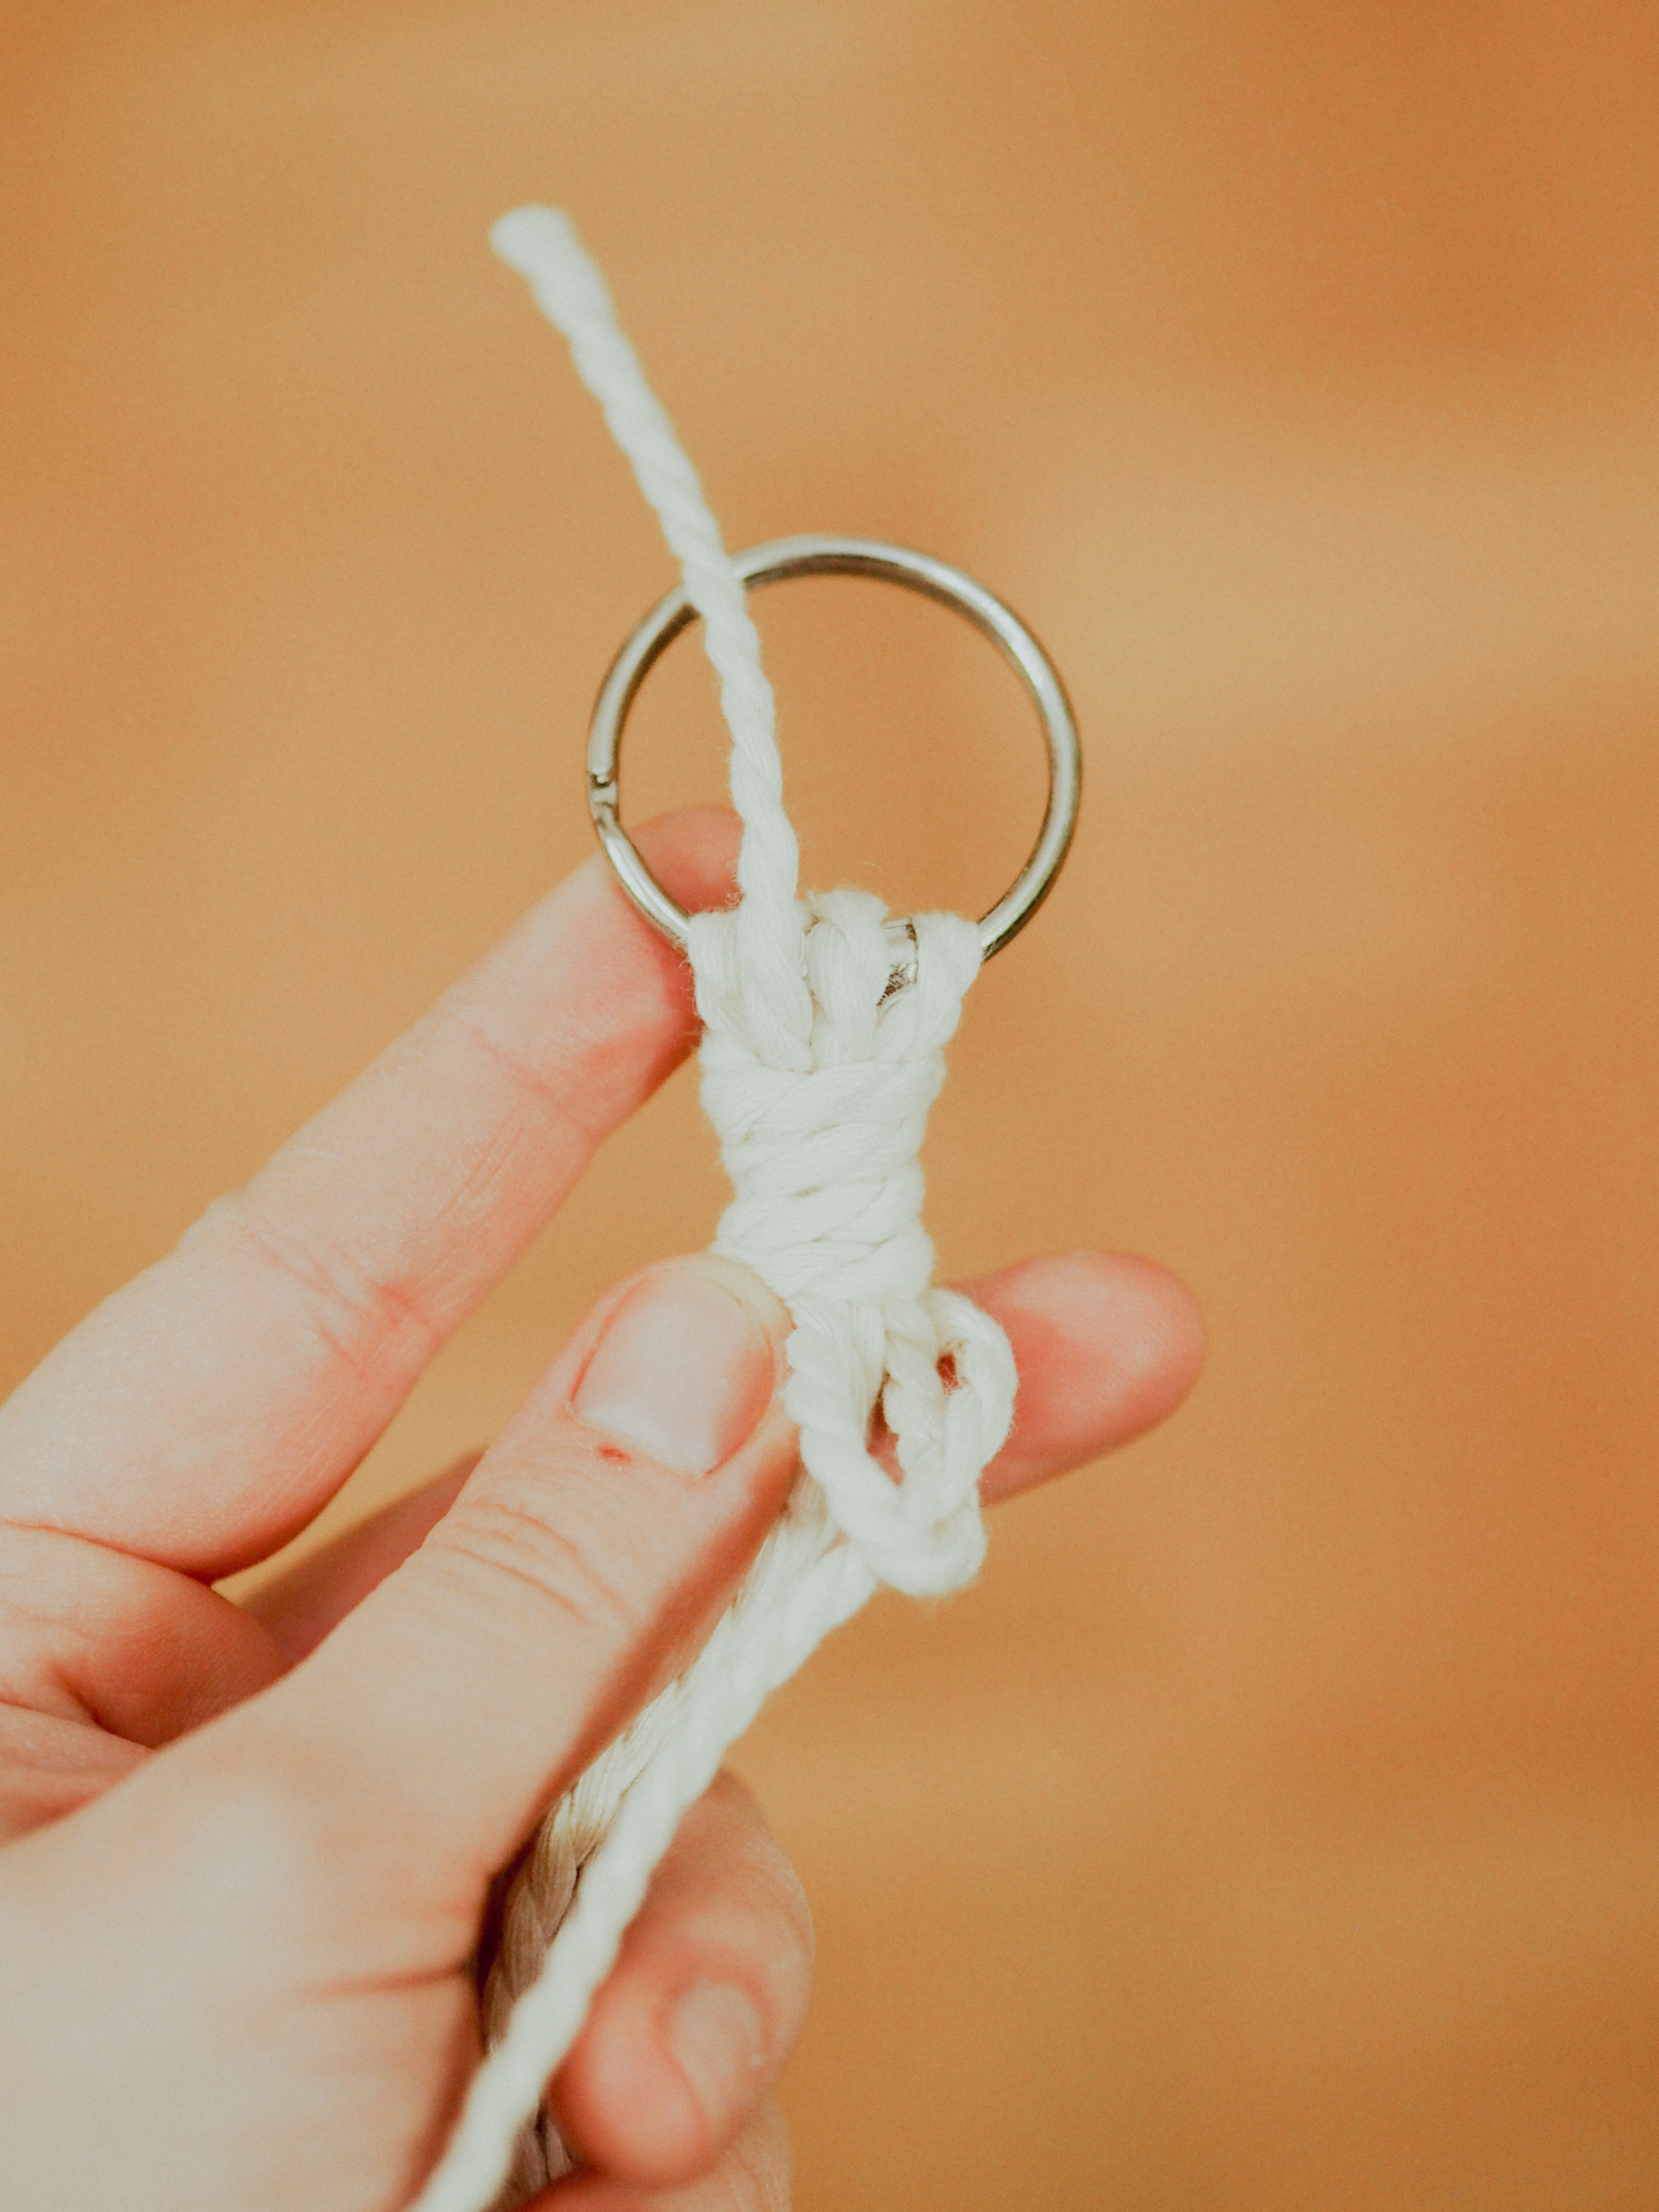
2. prepare the cords
Thread the four long cords through the metal ring and pull the ends evenly to the same length. You now have eight cords with which to continue working.
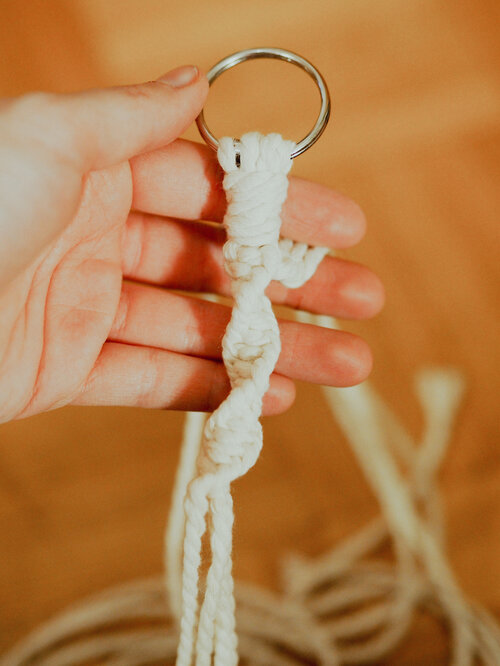
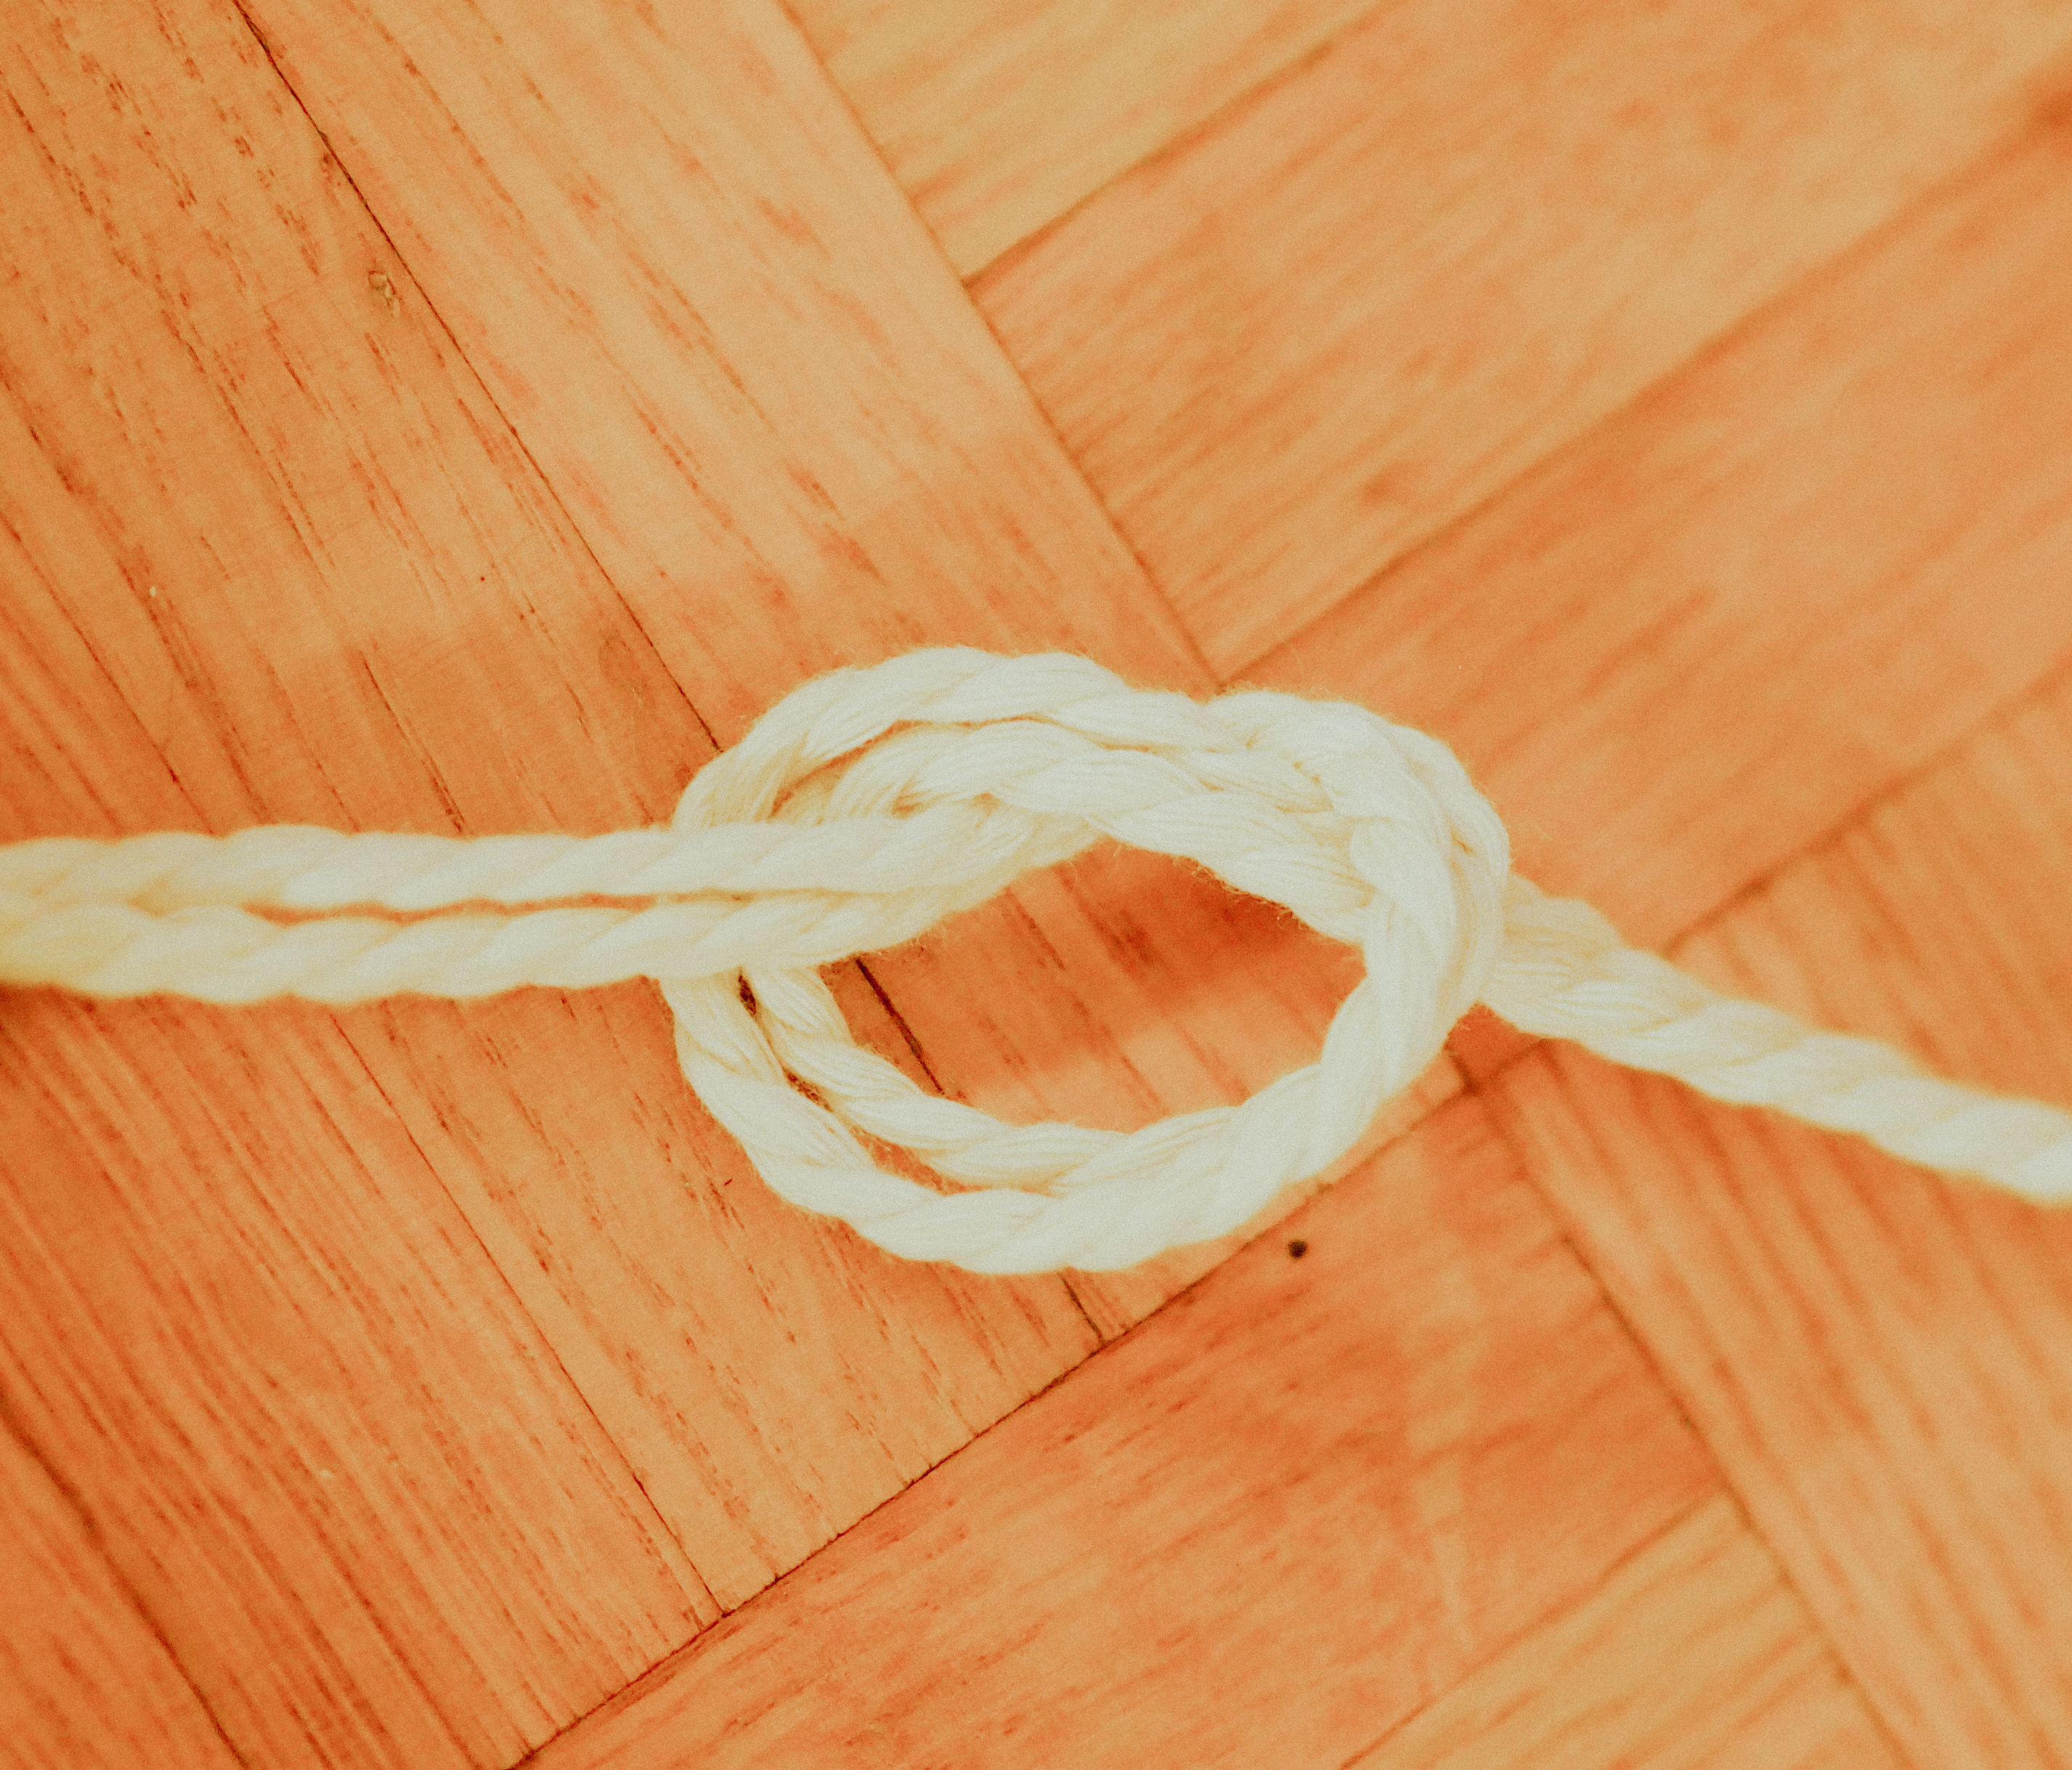
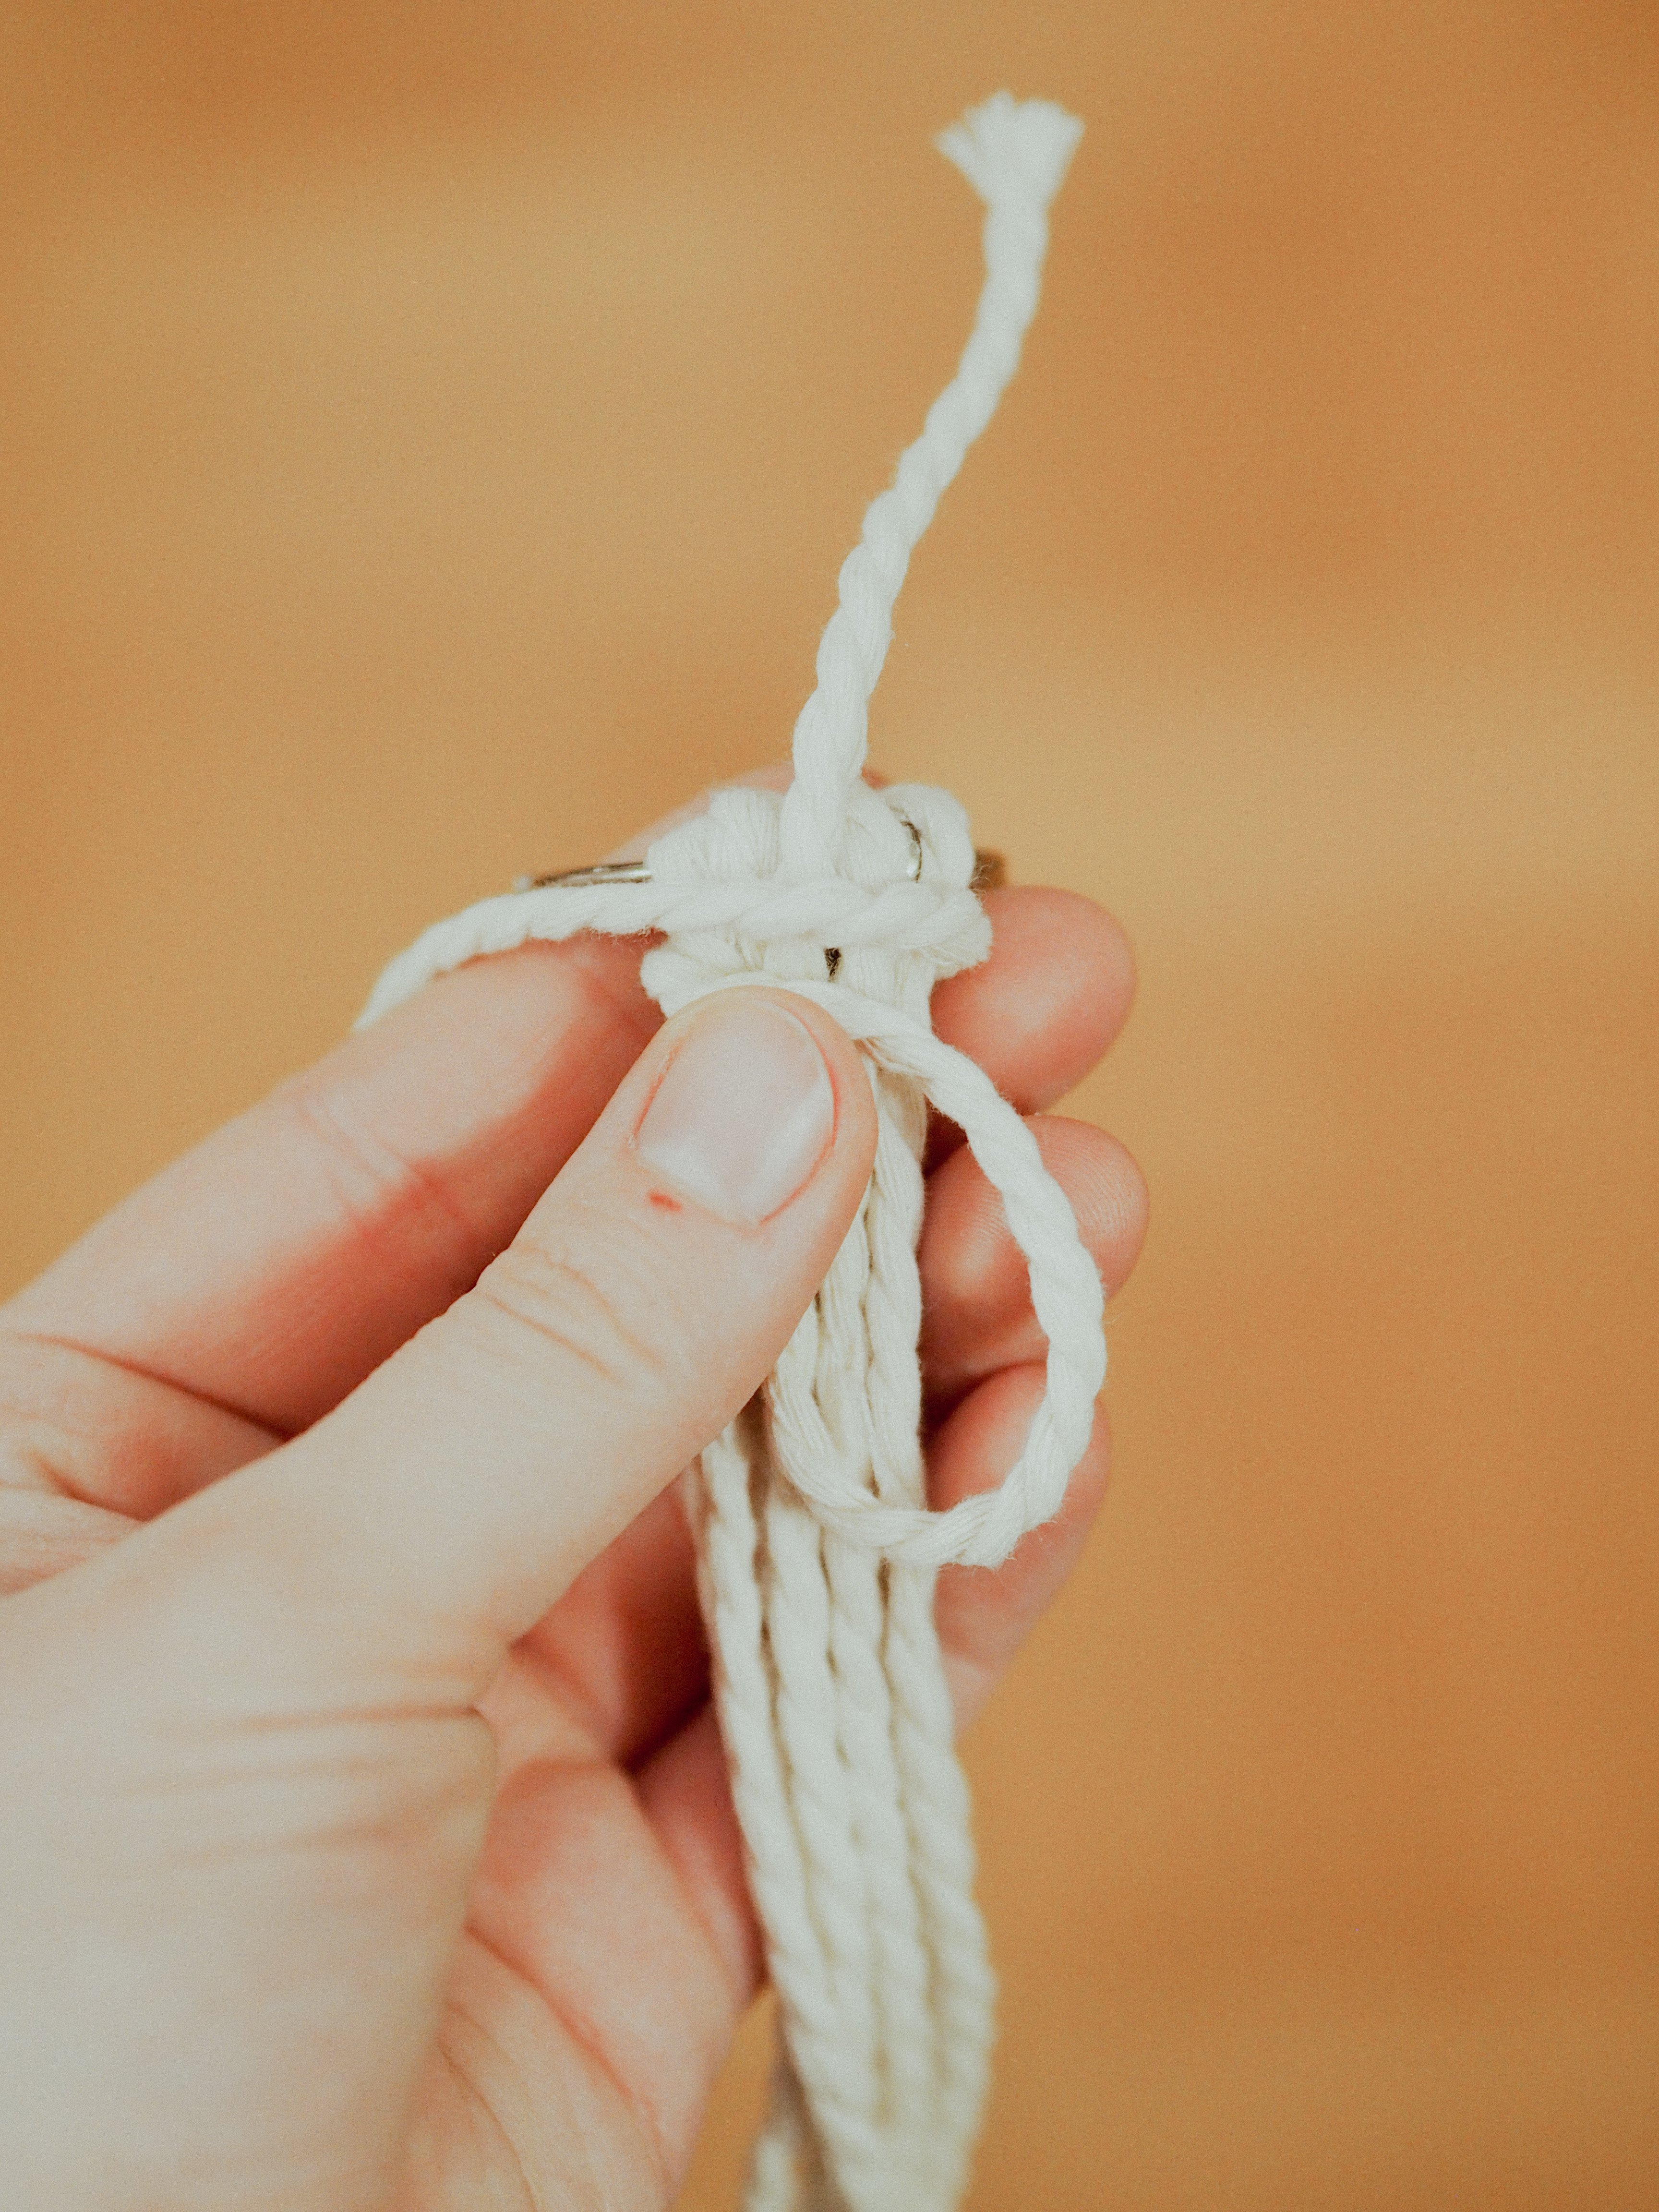
3. winding knot
Take one of the shorter cords and form it into a U. Place the U on the 8 cords, directly under the ring, so that the upper end protrudes about 10 cm. Wrap the longer end four to five times tightly around the eight ropes and then thread it through the bottom loop of the U. Pull both ends tight until the loop disappears. Cut off any excess ends.
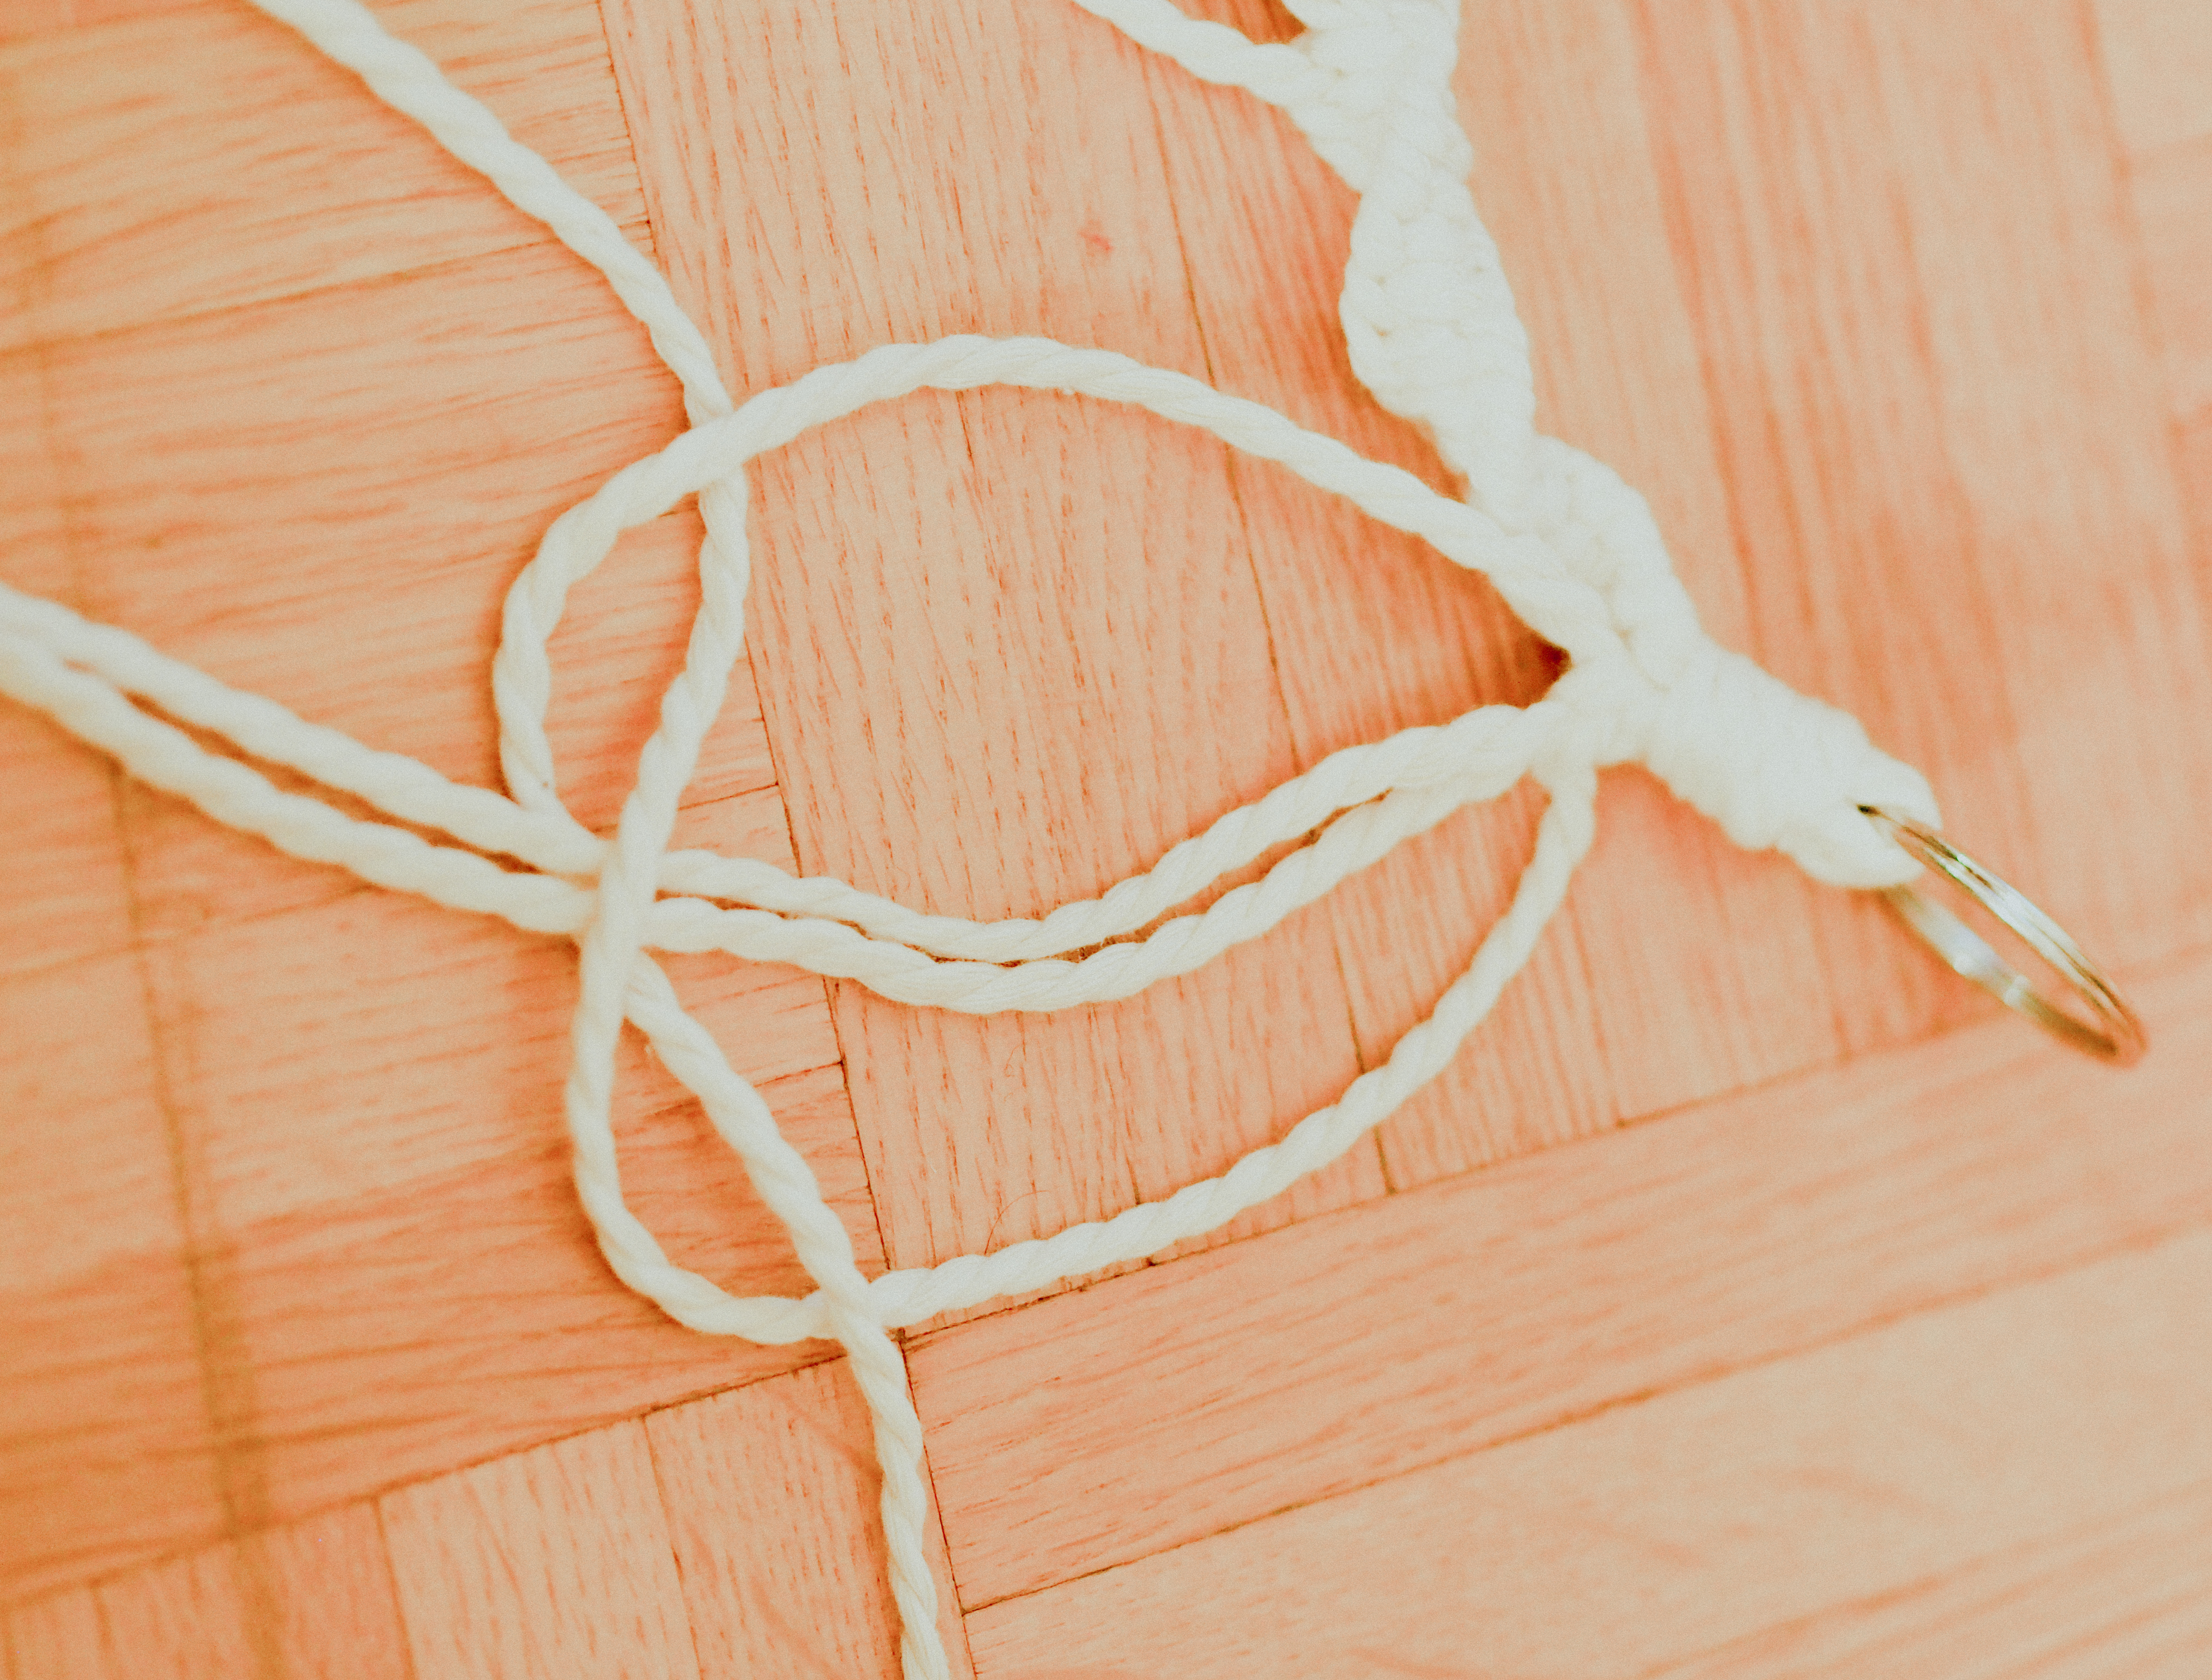
4. divide
Divide the eight cords into four pairs. Tie an overhand knot 20 cm below the ring in each pair.
5. Separate the pairs, combine neighbouring cords to form new pairs and tie a second overhand knot about 10 cm below the first.
6. Separate the pairs again and tie a third overhand knot.
7. Finish
Tie all cords together about 7 cm below the last knot with a winding knot. Shorten the ends as desired.
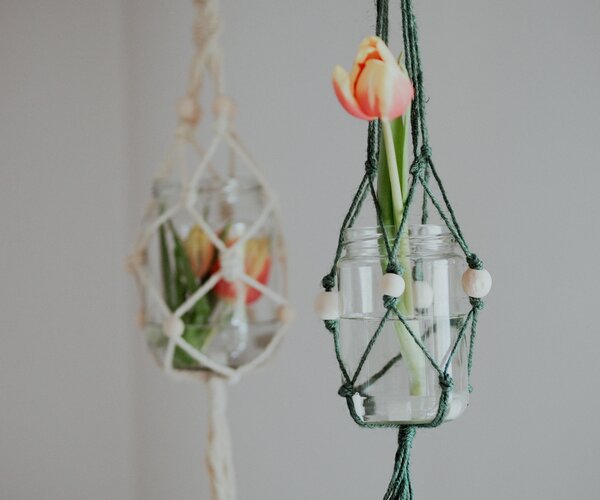
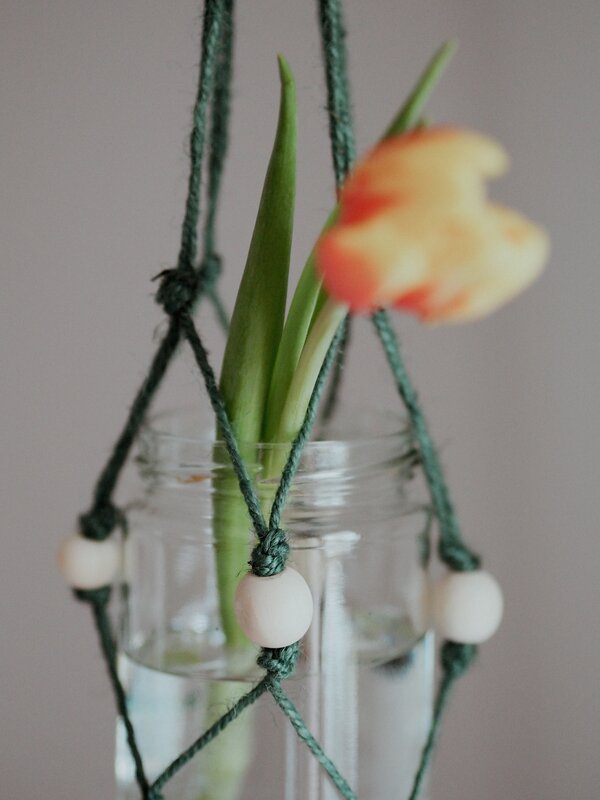
8. Design
Put a glass jar or a small flower pot in the hanging basket. Fill it with fresh flowers, cuttings or herbs – and your individual highlight is ready!
Knotology – the little heroes of macramé
Overhand knot
Make a loop with two cords. Thread the two cords through the loop and tighten them in the right position.
Wrap knot
This knot is used to hold several ropes or threads together. A thread is wrapped tightly around several threads.
Carrick knot
This knot requires 4 cords. Two cords always remain in the middle. Thread the right cord over the two middle cords and under the left cord. Now thread the left cord under the two middle cords and through the right loop so that the cord lies over the right cord. Now tighten the cords until they are close to the winding knot. If the same procedure is repeated for a few centimetres, the pattern will spiral inwards.


Tips & Tricks
Try it out and let your creativity run free. Wooden beads can be threaded in immediately after the first winding knot (then fix the beads again with a winding knot) or before the overhand knot.
If you want to make several spiral clove hitches, we recommend using eight pieces of string, each between 130–180 cm long. This will give you four beautiful spiral patterns. Then always use two pieces of string together with two further pieces to form a ‘pair’ and tie the clove hitches.
This may also interest you …

Garden & Plants
Wild herbs in winter – natural treasures for health and well-being
Whether rose hips, ivy or spruce – they are all little powerhouses that accompany us through the cold months. Discover how these plants can help you get through the cold season in good health and relaxed.
Beginner
3 minutes reading time
Household
Beginner
3 minutes reading time